Saturday 30 August 2008

The Bridge at Kimmelsbrücke.

Babbington's Legion marches across the bridge, en-route to their new employment.

An aerial view.

*
This blog received it's 5,000th visitor yesterday, and to celebrate here are some pictures of the finished bridge!
*
Known as the Three Kings Bridge, this crossing of the River Eisenwasser at Kimmelsbrücke was built in the late 15th century using the Gothic style of architecture. It took nearly ten turbulent years to construct, during which the then-Kingdom of Dunkeldorf saw three monarchs come and go. To commemorate these kings three busts were placed over the bridge spans. The bridge was fortified at the time of construction: the two towers were taller and broader and included gates and a portcullis to prevent hostile forces from crossing the river.
*
In subsequent decades the expansion of the Empire saw the need for a defended bridge decline and the gates became a marked inconvenience. In 1695 the towers were rebuilt in their present style. They currently include offices for customs & excise officials charged with collecting taxes and tariffs from those using the bridge and from river traffic passing beneath. Local legend has it that if any boatman should dare try to pass without paying his fee, the masks of the kings will belch forth flame and incinerate him - a legend stoked most assiduously by the customs officers...
*
The bridge and the town of Kimmelsbrücke lie within the Grand Duchy of Hetzenberg, on the west bank of the Eisenwasser. Only five miles to the east lies the uneasy border with the Margravate of Dunkeldorf-Pfühl.
*
Some dimensions: Overall length = 24 inches. Height of towers = 9 1/2 inches. Height of central arch = 2 1/4 inches. Constructed from Hirst Arts molds using Herculite 2 industrial-grade plaster, with some foamcore and card components. Paintwork in acrylics, with Klear varnish treatment. I'm open to commissions - if anyone wants a similar bridge, contact me at:- kirbycane822 @ hotmail.com (close the gaps - email harvester programs prowl these sites) and we can talk terms.

Thursday 28 August 2008

Conversion job - 3


And so it begins. After two hours of purgatory trying to model tricorns out of Milliput followed by an hour of dremmel-work the following day, I achieved the above results. Milliput is good but it has the annoying habit of sticking to anything but what I want it to stick to! Give the stuff its due, it does set hard and stay in place. The queues of hair worn in this era I replicated by using spackle powder mixed with a drop of Klear/Future floor polish, pushing the resulting concoction around with a brush until I got what I wanted. Unconventional yes, but who cares? Not I! It works and takes paint well.
*
In some cases the tricorns are a little bigger than most styles found during the mid-18th century, owing more to the Marlburian Age perhaps, but on the whole I don't think it a bad result. I justify it in saying the Markgraaf of Dunkeldorf-Pfuhl is an old-fashioned type and this outlook carries over into his army.
*
So, the regiment is now mounted on my painting block, each figure being glued to a dowel using a blob of "No nails" type adhesive which will hold them in place until I detach them. At least, they should stay in place now. In a moment of absent-mindedness I moved the block before the glue was set and two figures fell off, landing on their bayonets (of course!). These remained attached but weak, so I might replace them using a length of pin or shaped brass rod.
*
As for my other project, the Bridge, painting of the main structure has begun and construction work on the quayside sections is almost complete. I need to do a spot of measuring up tomorrow night to check these against the scenic tiles used at the New Buckenham club in order to ensure a good fit. All being well, I should have the bridge finished this weekend. "Pictures at 11..."

Tuesday 26 August 2008

Conversion job - 2.

The assembled cast(ings)

Standard bearers with untouched officer for comparison.

A bit blurry but this shows the shape of the modified headgear compared with the fifer on the left.


The Commanding Officer and a soldier to be.


Some prospective candidates for conversion...
*
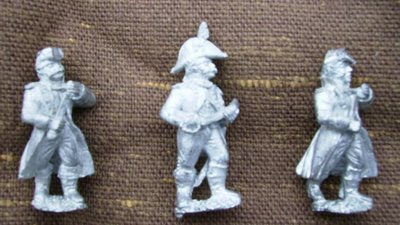
As requested, some photos of the work in progress. These are all Republican-era French Napoleonic figures by Front Rank miniatures (early 1990's vintage) from the lead mountain. I'm not that knowledgeable about the French army of the period but suspect the foot figures are either Republican Guard or line grenadiers. I found a nice line infantry drummer figure walking with his drum slung on his backpack. With a little judicious dremmel-work his shako trimmed down to a neat bearskin mitre. The left hand and middle cavalry figures in the bottom picture are possibly light dragoons (?). The right hand figure might be a Horse Grenadier of the Guard. I'll need to buy mounts for them - there were none in the heap I acquired - but this will come in time. The figures were cast with the saddle attached, so the horses will have to suit this. They will be modified to serve as a hussar regiment and the infantry will make up the second line regiment of the Markgraaf of Dunkeldorf-Pfuhl's army. Since taking the photos I've discovered a mounted general which will also bear conversion to a SYW style.
*
Work so far - the bicorns have been trimmed off the two standard bearers (the officer figure shows what they looked like beforehand), and the commanding officer's shako and sword have been removed. The sword will be replaced by a length of flattened brass rod at a later date. I've begun removing the feathery epaulets from the rank and file figures, and assessing the possibility of slimming-down the visible leggings under the hems of their greatcoats. I don't think they're that noticeable now, and will be less so when painted and the figures attached to their base. Even so, if I can alter them without damage, I'll do so. Tricorns will be added using either Milliput or Green Stuff.

Monday 25 August 2008

Conversion job - 1

Having come into possession of a heap of Napoleonic French figures some years ago, I've been rather stuck to get rid of them. For the most part they're "minority" figures, i.e in poses or of a type which gamers only need a few of. This has been a real bind and I can't even seem to interest anyone in buying them at the base metal price.
*
However, a piece on Adderphue's blog mentions his use of figures from other periods to create a SYW ImagiNation, and this got me thinking. I went through the box once more, and picked out a number of figures with an eye to converting them to SYW-style troops. I was in luck, for the box yielded a range of infantry figures wearing greatcoats. Most are bare-headed, some wear forage caps or bonet de police and all can be converted merely by removing epaulettes and adding tricorns. The command figures have bicorns which can be trimmed and tricorns substituted. A drummer and fifer wear shakos which can be pared down to a basic grenadier mitre shape. Since a greatcoat is a greatcoat whatever the period, I now have a new regiment in the making!
*
When I have the funds I might pay someone to create a master figure and a mold from it. And once the remaining figures have been thoroughly picked over, they will be melted down to create new figures.

Thursday 21 August 2008

The Bridge Project - assembled.

The three bridge spans and towers - paint test on right bank tower base.

A boatman's eye view .


The three main components.

*

Progress is being made! All the major construction work is finished. It only remains to make the quaysides from which the bridge will spring, and I'll begin work on those this weekend using 1" blue insulation foam as a base. Once all is assembled, the bridge will be painted with Klear (Future in the US) polish to seal the plaster, followed by blocking-in the stonework with a sandy-ochre color using Crown-brand "eggshell" paint designed for use on plasterwork and wood. A small test patch can be seen on the right of the middle picture. All finer paintwork such as weathering effects, the tower sides, timbers and roofs will be done in acrylics. The interiors of the spans were painted before being fixed in place.

*

As mentioned before, all major construction was done using plaster casts made from the versatile Hirst Arts molds. The roofs are of card with the tiles cut from individual strips and the whole treated with Klear for additional strength. For ease of transport the model was built in three sections which will rise to five when the quaysides are done. This has the added benefit of allowing me to insert different central spans over time, such as a broken one showing a bridge demolition, and perhaps a Dutch-style double drawbridge to allow passage by masted vessels. The figures posing on the bridge are natives from my Daftest Africa campaign world awaiting their basework.

Sunday 17 August 2008

Sobelsburg Jagers

The light infantry contingent of the Markgraaf's army are now painted and stuck onto their bases. I'm following the Shako rules system and having only eight figures, two to a base to represent the unit in skirmish order. Under the rules light infantry in good cover can be a real pest to formed troops but are rightly vulnerable to cavalry in the open. If contacted in melée in the open by formed troops of any kind, they just vanish from the table, which saves time working out the combat.

Friday 15 August 2008

Babbington's Legion - almost...

The final coat of Klear is drying on these figures and all that remains is for the basework to be done. That'll have to wait until I get some PVA to make my favorite gunk mix. The Legion is made up of Front Rank figures, and I find them a fiddly task to paint compared with RSM95 and Spencer Smith. They do take a black wash well which brings out the detail, but I prefer the other makers.
*
The bridge project is nearing the end of the construction phase. I have to work out the design of the river bank sections the bridge will spring from, build the entry ways, and then it's on to painting the brute. Hi ho...

Thursday 14 August 2008

Babbington's Legion - almost there.

One advantage to getting some half-painted figures - less work to do! Here're a couple of pictures of Babbington's Legion, the "White Company" or mercenary regiment that has just accepted service with the Markgraaf of Dunkeldorf-Pfuhl.


The colors, symbols and regimental motto Foy est tout ("Faith is all") are those of the Babbington family.
*
A tradition of mercenary bands in this part of Urope is to have a regimental/ colonel's color, and a second flag in the primary colors of the hiring nation or patron. Those regiments between employments are said to be "empty staff," in other words the staff is devoid of any flag. When on the march through neutral territory, this staff is displayed at the head of the column to signify peaceful intent. Some nations also insist that such bands march with their arms in the baggage train while in transit through their territory.
*
If a mercenary regiment is in action and finds itself in a tight spot, the colonel or surviving senior officer has the right to order the regiment to "go light," ie. to remove the hirer's colors and replace it with a white flag. Under the laws and usages of war, this must be respected as a flag of surrender and the unit permitted to leave the field or fortification under escort with its arms and equipment. Only if the unit has fought well may it keep its regimental colors. Once a mercenary unit goes light it may not take further employment with its former patron during the current conflict or for one year and a day, whichever occurs first.

Monday 11 August 2008

Markgravate light infantry (Sobelsburg Jagers).

*
Like many other countries the Margavate army recruits its light infantry from border regions, in this case the "Cockpit," a region of hills and forests bordering the Grand Duchy of Hetzenberg. Above is shown the uniform of the Sobelsburg Jagers, the only regiment of light infantry so far raised by the Margravate. The orange cuffs and facings are as "hot" as they appear but a few weeks on campaign soon causes it to fade to a more russet tone. A stiff leather helmet is the official issue, but the jagers soon modify it by adding or swapping out components of softer leather. The brass buttons are supposed to be worn in the field but again, the jager follow their own rules and either cover them with cloth or swap them for pewter buttons. To reflect their origins in the hunters and trappers of the border region a patch of black fur or wool is worn around the collar.

*

A certain amount of snobbery exists in the army command. There's a tendency to look upon the jagers more as tradesmen, there to do a messy but necessary job, rather than soldiers. This is resented by the jagers who rightly feel they perform an arduous duty for scant reward.

Wednesday 6 August 2008

The Bridge project - ongoing.


*
A couple of shots of the work in progress. Three stalwart chaps from the nascent Babbington's Legion pose for scale. In the bottom photo they stand just in front of the left bank tower footings.

Tuesday 5 August 2008

Babbington's Legion-to-be.

*
The bridge project is coming along nicely. It pays to plan well ahead! I've just begun the process of painting the interior of the three spans before closing the arches. In the meantime here are a couple of pic's of the Front Rank figures which will be turned into the mercenary Babbington's Legion and light infantry for the army of Dunkeldorf-Pfuhl. Apologies for the indistinct images; once again I'm having to use a webcam, which lacks the photographic finesse of a full-on digital camera. Once the bridge is complete I'll turn my attention to painting these.

Sunday 3 August 2008

Under construction - 1

Tile & miter box with basic shell of left bank tower.

The Central span arches with basic components for comparison.

The left bank tower & columns.
*
Due to some glitch affecting my browser I was unable to update this blog yesterday. Whatever it was that caused Internet Explorer such angst seems to have cured itself, so, on we go.
*
Work has begun on the bridge for 17th century-plus wargaming. As mentioned before I'm using components made of the extremely tough Herculite 2 plaster cast in Hirst Arts molds for the majority of construction. As it happened I didn't need to make as many casts as I'd planned, as I have plenty of spare components in store that suit the project. To make it easier to transport the whole structure will be made in three separate parts comprising the two towers with side spans, and the wide central span. All will be mounted on bases made from two layers of thick card laminated with PVA and sealed with Klear/Future floor polish. MDF might be better in some ways but I find card easier to work with.
*
The top picture shows the beginning. A perfectly flat surface is essential for constructing buildings using the plaster blocks as any errors that creep in tend to become magnified as work advances. I use a spare ceramic wall tile for this purpose, and a miter box to ensure perfect 90-degree vertical angles for the walls. Legos are ideal for this job but I gave mine away long, long ago...
*
The blocks are glued together using PVA adhesive: Aleene's Tacky Glue is good too. Both types of adhesive allow some time for parts to be adjusted before they set. In the event of an error being noticed afterwards, the blocks can be soaked in water, separated, dried and re-glued without harm. Some of the components require sanding to remove the occasional irregularity where the plaster is poured into the mold but this is easily done. The irregularities can be avoided altogether using the techniques described on the Hirst Arts website. Each component is in multiples or fractions of inches, which makes it easy to calculate the number needed and the area they'll cover. The base shell of the left-bank tower is shown next to the miter box, and measures 5 inches long by 2 inches wide.
*
While this was drying I assembled the arches that will form the central span of the bridge. Bruce Hirst cleverly designed these components so they can make either 4-inch or 3-inch wide archways depending on their alignment. My span uses the 4-inch version here; 3-inch arches will be used in the tower gateways.
*
The smaller 2-inch wide arches shown in the lower photo are formed from 4 pieces, and will make up the two smaller spans between the towers and the central span. The photo shows two of the arches being checked in the dry assembly stage before gluing to the left bank tower. A roof made from thin card will arc between the tower and the pier on the right. Before this is fitted, I'll paint everything within the area to be enclosed as it'll be too difficult to do afterwards.
*
In the forefront I've shown two of the Gothic columns that will stand on the corners to the right of the arches. Although the photo doesn't show it that clearly, the finials are designed in the shape of heavily-bearded faces. I think it'll add a nice distinctive touch to the design, as they'll frown down at anyone passing under the bridge as if warning them to behave and respect the river!
*
Both towers will butt up to blue insulation foam terrain tiles sized to fit in with those used by the New Buckenham club. I'll make these last, and they'll have stone-flagged quaysides with bollards.